Photoshop Overview
Adobe Photoshop has a ton of tools and features. It will seem like a lot of information at first, but you will feel more comfortable the more you practice and get used to the program.
1. Photoshop Overview
In the screenshot below you will see everything labeled, which will be explained in more detail further down on this page.
1. Photoshop Overview
In the screenshot below you will see everything labeled, which will be explained in more detail further down on this page.
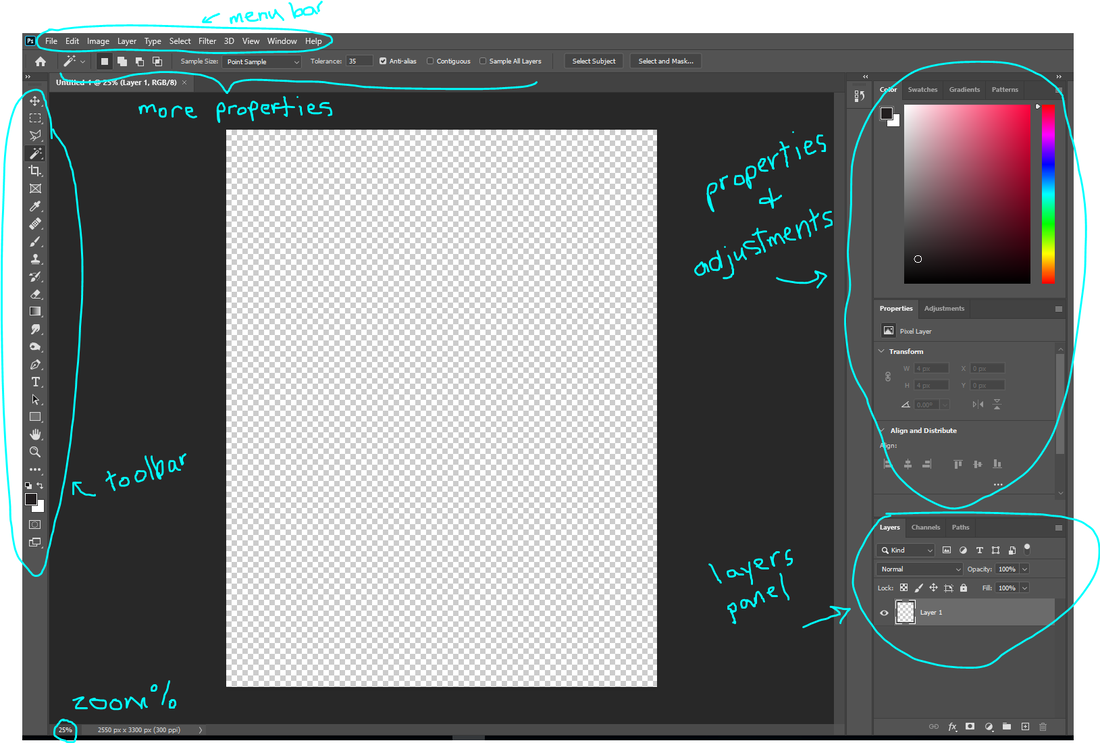
2. Tool Bar
The Tool Bar is the set of tools on the left hand side of Photoshop. This is what you will be primarily using when you work in the program. I will teach you a few new tools at a time until you will eventually be able to use almost all of them.
The Tool Bar is the set of tools on the left hand side of Photoshop. This is what you will be primarily using when you work in the program. I will teach you a few new tools at a time until you will eventually be able to use almost all of them.

4. Properties and Adjustments
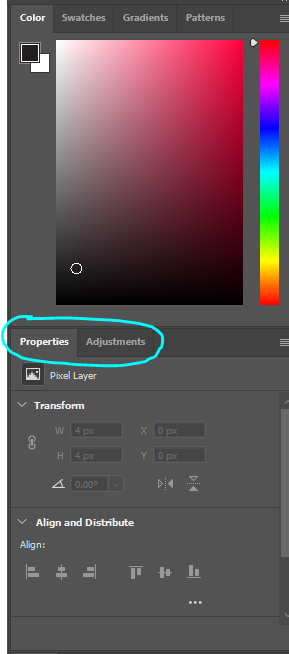
The Properties and Adjustments panel which can add even more customization to your tools can be found in two places. There is a full Properties and Adjustments panel on the far right of your screen above the Layers and then there is a mini, essential Properties bar at the top of your screen right below the Menu Bar
The Properties and Adjustments panel which can add even more customization to your tools can be found in two places. There is a full Properties and Adjustments panel on the far right of your screen above the Layers and then there is a mini, essential Properties bar at the top of your screen right below the Menu Bar

3. Layers Panel
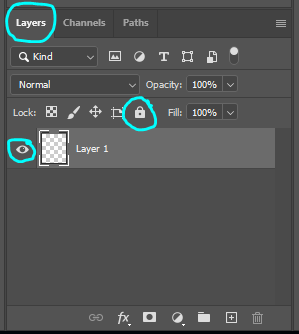
The Layers panel is probably the most important panel in Photoshop. It will seem confusing at first, but it is very important to streamline your artwork. Even though the images on your computer screen are 2D, every image or object you make stacks on top of each other. Think of layers like a sandwich: each time you draw something new or create a new edit, you are adding it as a new ingredient on your sandwich.
You can re-order your layers by clicking and dragging them within the layers panel, you can also turn the visibility on or off in the layers panel by clicking the eye icon, and you can lock the layer making it no longer editable by hitting the master lock icon.
5. Menu Bar
At the very top of the screen you will find the Menu Bar. The Menu Bar has your typical options such as saving, copying, undoing, etc., but it also allows you to do some pretty cool manipulations and effects which we will talk more about later.
At the very top of the screen you will find the Menu Bar. The Menu Bar has your typical options such as saving, copying, undoing, etc., but it also allows you to do some pretty cool manipulations and effects which we will talk more about later.

|
Within the Menu Bar before we get into the actual tools in the Tool Bar. It is essential that you understand these concepts so that you are capable of doing more unique things with the tools.
1. Edit Tab in the Menu Bar The Edit Tab in the menu bar has a lot of options, but there are 3 specific ones you should be aware of which are: -Copy: to copy an image (Ctrl C) -Paste: to paste an image (Ctrl V) -Undo: to undo the last thing you did (Ctrl Z). You can undo as many times if you need to (Ex. I can undo my last 20 actions if I wanted to get rid of what I did) -Transform: this allows you to modify an object or image. The ones I use the most are "Flip" which will mirror flip an image and "Scale" which can make an image larger or smaller. You also have move, rotate, and warp options. |

|
